The Paper Grain Manifesto
All paper has a ‘grain’ to it, except for hand-made paper, which can have a very weak grain sometimes. The grain is the way the slushy pulpy solution was running through the machinery at the manufacturer and naturally aligns together with the direction of the flow. It has nothing to do with the finish of the paper. That is, technically, the surface texture.
You’ll have fewer frustrations and UT OH moments when you align the grain of your paper with the rest of your project. Think of this as stacking up currency so it is all facing the same way, and not all jumbled up like it came from the Salvation Army donation bucket. Which way will be easier to handle and count?
I’d prefer to count the ones all lined up the same way.
Now, why do we care about grain?
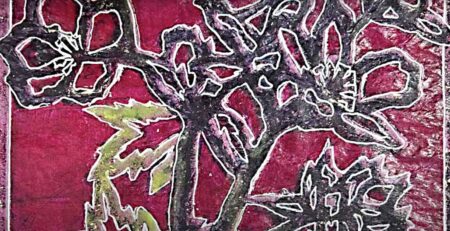
- Tearing with the grain is far straighter and easier, than against it. You’ll have a paper with less of its own agenda when tearing with the grain. We’ve all been there, carefully tearing a sheet and then watching it suddenly go completely away from the fold, ruler, etc. Whoops!
- If you are binding a book, matching the grain of the papers to the grain of your covers will result in a much happier book, with far less penchant to warp, buckle, and generally be unruly sooner or later.
- If you are making a book, nestling the pages together which have the grain all going the same way and folded along with the grain, will make them settle in thinner, easier, and better.
- If you are mounting something to frame it or stabilize it, the last thing you want is your paper fighting with a mounting surface that has a different grain. Even chipboard and binder’s board have a grain.
- When using a wet medium or glue, paper stretches differently with the grain than it does against the grain. If you are gluing two things with the same grain direction, that’s going to dry much nicer and with fewer buckles. In close-call situations, the drying of mismatched grains can be devastating to the final art.
The Bottom line: Any paper item that needs to hang out or be attached next to another one, should match the grain to each other. It helps to preserve alignment long-term and is likely the second most important art step in paper selection right after whether something is acid-free or not. In a perfect world, that paper you want to tear should be designed with the grain direction going the same direction you want the tear.
But how do you tell which way the grain is going on your paper?
There are a few ways and tests.
- Before doing anything, read the labeling. Sometimes paper manufacturers will note it for you. “Short” or “Long”, which means the grain runs the same way as the short side of the paper, or the grain runs the same as the long side of the paper. Nearly all letter-sized paper sold in the US for printing in computers is grain long. A few manufacturers DO make short-grain paper available, likely at a higher cost. But this is only true of 8.5 x 11 paper. (More later…)
If your paper is not labeled, (and sadly, I find fewer and fewer are labeled by the year) then you start sleuthing! - Try to bend it, without creasing. This test is not destructive. Bend it one way, then the other way. The bend that has more resistance to it is across the grain, not with it. Practice on everything you find so you can get better at identifying grain. Guess, and when unsure, use #3 or #4 below to verify your guess. As you do this more and more, you will gain expertise and confidence in the “feel” of this discovery.
- If you are willing to sacrifice paper, then use water to see which way it curls. you don’t need a big piece, but enough to be able to let it curl up. Whichever way the paper curls, it is curling around the grain of the paper. I quickly wet it with a bit of water from a sponge, smooth the water over some of the paper, then put it down. Which way did it curl? The pipe of the curl is the direction of the grain. Don’t get it too wet, or well, soggy makes a crummy test subject. (I learned this the hard way.)
- Again, this is going to take a sacrificial piece, but you can tear it one way, then tear it the other. The straighter tear will be with the grain.
You will find videos and web pages that explain this in more detail. The video that was my AHA moment was the one by DAS Bookbinding. He takes different materials, shows you how he tests, and marks the results as he goes. I watched it a few times! Here’s his Excellent YouTube Video: What is Paper Grain and How to Identify the Direction.
Now it’s time to sharpen your skills. Test on your printer paper. Test your junk mail. Find out what your sketchbooks and notebooks are. Even that scrapbook paper has a grain.
I mark the grain in a sharpie on the cover of every single notebook and art paper book/pack I get. I pull it out 6 months later, and I’m always so relieved to see I’ve already tested and recorded it. I can go to the next step right away! For one-offs, I will use chalk to mark it or include an acid-free extra sheet of paper on top with the information.
Hacking Paper Sizes and Grain
So you needed an 8.5 x 11 sheet to fold into a half-sized booklet. But your printer paper is long… and 4.25″ for each page seems really small to you. The shops are full of paper, all unmarked whether they are long grain or short grain, and you really do not want to pay what it costs to mail order Mohawk Superfine short grain paper to get the correct grain.
- Make your salespeople at the store find out for you. Someone up the chain, sooner or later, knows the direction of the grain of the paper.
- Consider buying a ream of 11” x 17” paper in your chosen weight/finish. It is a very unusual 11 x 17 printer paper on the retail market which is not long grain, they’re made to go into copy machines and printers the long way, too. Cut it in half!
Before you cut an entire ream of paper yourself, though, consider taking it to a print shop to have it cut in half (on the 17” side) to make two stacks of 11 x 8.5. PRESTO. Your “letter-sized” paper is now short-grained. Wrap up your two parts, and label them carefully so nobody in the house uses them for printing out this week’s coupon at the store, and you will have paper when you need it. Staples will cut stuff, Kinko’s (Or whatever its name is this year), your local printer, and all sorts of people can make exacting cuts on a ream of paper for you. It’s a buck to 3 bucks for a cut where we live.
HOWEVER … 12” x 18” paper does not necessarily work like this. This size will take sleuthing. - If you need sketch paper or art paper, you can often ask the manufacturer for the grain direction. I have noticed that sketchbooks bound at the top are more often grain short than those bound on the side. SOME manufacturers will also note the grain direction in the way they mark up the size of the paper on the label, with the grain direction being the second number in the dimensions: 8.5 x 11 is grain long, 11 x 8.5 is grain short. SOME are marked this way. not all of them.
Happy Papering and Tearing, Arty Friends!
Got Questions? Chime in below! Want to know about PM’s favorite Papers? Click Here